
Pretreatment for rack plating
This is the "Rack Plating Pre-Treatment Survival Guide" (including the Special Environmental Protocol).
The Reality: You mentioned your Paint Room is next to the Plating Line. This is a nightmare scenario. Paint mist contains silicone, oil, and resin dust. If these float on your pre-treatment tanks, when you lift the rack out of the cleaner, you drag it through the oil slick, re-contaminating the part instantly.
The Result: "Galaxy" spots (pinholes), blistering, and rough plating.
Here is the Master’s Standard for managing a high-risk pre-treatment line using the [QLQ System].
⚓ Rack Plating Pre-Treatment Manual (The "Zero-Peel" Zone)
Target: Zinc Alloy Die-Castings & Brass Accessories.
Goal: A chemically active surface with Class 0 Adhesion, despite a dirty environment.
Environment Challenge: Paint Mist & Dust Contamination.
Part I: The "Paint Room" Defense Strategy (Special Protocol)
Before looking at chemicals, you must solve the floating oil/dust issue.
1. The "Overflow Weir" Principle (Mandatory)
The Problem: Dust and Paint mist float. If you use a static tank, the surface becomes a layer of scum.
The Fix: Every Rinse Tank and Cleaning Tank must have an Overflow Weir (Surface Skimming).
Action:
Pump water into the bottom.
Let water overflow over the top edge into a gutter.
This pushes the floating paint/oil away continuously.
Rule: If the water surface is stagnant, you will have defects.
2. The "Surfactant Shield"
The Problem: Paint mist is hydrophobic (repels water) and sticks to the rack.
The Fix: Add 1 ml/L of [QLQ] Wetting Agent to your Rinse Tanks.
Why? It reduces surface tension, preventing the floating oil from clinging to the parts as they exit the tank.
3. Physical Barrier
Action: Install heavy clear PVC Curtains between the Plating Line and the Paint Room.
Pressure: The Plating Room should have positive pressure (Air blowing out towards the paint room), not sucking paint in.
Part II: The Process Workflow (SOP)
Standard Cycle for Zinc Alloy (Most Sensitive).
| Step | Process Name | Time | Temp | [QLQ] Chemical | Tech Note (Critical) |
| 1 | Hot Soak Degreasing | 5-10 mins | 60-75°C | [QLQ] Zinc Cleaner (50 g/L) | Removes polishing wax and oil. Must be hot. |
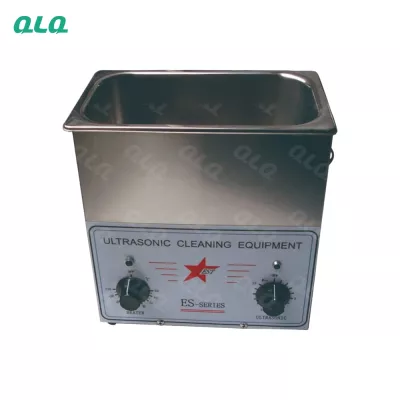
| 2 | Ultrasonic Clean | 3-5 mins | 60-70°C | [QLQ] Wax Remover | Removes impacted wax from logos. |
| 3 | Spray Rinse | 30 sec | RT | Clean Water | High Pressure Spray is best to remove particles. |
| 4 | Electro-Cleaning | 30-60 sec | 50°C | [QLQ] E-Clean Salt | Cathodic (-) ONLY. 4-6 Volts. Hydrogen bubbles scrub the surface. |
| 5 | Counter-Flow Rinse | 1 min | RT | Water | Overflow ON. Remove alkali residue. |
| 6 | Acid Activation | 10-30 sec | RT | [QLQ] Fluoride Salt | NO HCl. Surface turns matte light grey. |
| 7 | Final Rinse | 1 min | RT | Pure Water | Enter Plating Tank within 30 seconds. |
Part III: Critical "Do's and Don'ts" (The Rules)
Rule #1: The "Water Break" Test (Every Hour)
The Test: Lift a rack after Step 6 (Acid Activation). Look at the water film on the buckle.
Pass: Water creates a continuous, smooth sheet.
Fail: Water beads up or breaks into islands (like rain on a waxed car).
Action: If it beads, STOP. The oil is not gone. Increase Soak Temp or Dump the Electro-cleaner.
Rule #2: Cathodic Cleaning ONLY (For Zinc)
The Error: Using Anodic (+) cleaning on Zinc Alloy.
The Result: The Zinc dissolves, creating black smut and pitting.
The Fix: Rack = Negative (-). SS Plates = Positive (+).
Note: For Brass/Steel parts, you CAN use Anodic cleaning.
Rule #3: The "Acid Trap" (Hydrochloric Acid)
The Error: Using HCl on Zinc.
The Result: HCl attacks the aluminum-rich skin of the die-casting, causing "Star-dust" blistering (tiny bubbles).
The Fix: Use [QLQ] Dry Acid Salts (Fluoride/Sulfate based). It etches gently and whitens the part.
Rule #4: Copper Strike Entry
The Error: Entering the Cyanide Copper tank with no current.
The Fix: "Live Entry." The rectifier must be ON (3V) before the rack hits the solution. This prevents loose immersion copper.
Part IV: Master's Troubleshooting (Paint & Dust Issues)
| Defect Symptom | Visual Appearance | Root Cause | The Master's Fix |
| "Galaxy" Spots | Tiny rough particles / Pits. | Floating Dust/Paint. | 1. Turn on Overflow Weirs. 2. Install Filter Pump on the Hot Soak tank (often ignored). |
| Blistering (Peeling) | Plating lifts off base metal. | Oil Residue. | Failed Water Break test. Change Electro-cleaner bath. |
| Dark / Black Smut | Black film after Electro-clean. | 1. Reverse Polarity (Anodic). 2. Copper contamination. | 1. Check Rectifier cables. 2. Check if copper hooks dissolved in the tank. |
| White Patches | Unplated areas in corners. | Polishing Wax remaining. | Ultrasonic power is weak. Check transducer amps. |
| Roughness on Top | Roughness only on top of rack. | Scum Layer. | The rack was lifted through a dirty surface layer. Skim the tank manually. |
Part V: Maintenance Checklist for the Technician
Daily Start-up:
The "Paper Towel" Skim: Drag a large sheet of paper towel across the surface of the Soak Cleaner and Acid Dip. It picks up the floating oil/paint slick instantly.
Nozzle Check: If using spray rinses, ensure nozzles aren't clogged by calcium.
Temperature: Confirm Soak Cleaner is > 60°C. Cold soap does not clean.
Weekly:
Dump Acid Dip: Acid activates metal but accumulates dissolved zinc. Old acid = Blistering. Dump it weekly (it's cheap).
Clean Anode/Cathode Bars: Sandpaper the copper V-blocks and rack hooks. Poor electrical contact = Poor cleaning bubbles.
Part VI: Efficiency & Cost Control
1. The "Pre-Dip" Strategy
Cost Saver: Use a "Pre-Dip" static tank of dirty cleaner before the main Soak Tank.
Benefit: It removes 60% of the heavy oil, extending the life of your expensive main Chemical Tank by 2 weeks.
2. Rack Maintenance
Issue: Plating build-up on the rack tips (Hooks).
Risk: Thick hooks steal current and trap chemicals (carry-over).
Action: Strip racks in Nitric Acid every 10 cycles. Clean hooks hold parts tighter and plate faster.
🌟 Featured Album: The "Surface Defender" Series
Description for the Blog/Guide Album:
🛡️ The "Surface Defender" Album: Beating the "Paint Room" Curse
Running a plating line next to a painting line is asking for trouble. Dust, silicone, and paint mist are invisible enemies. This album teaches you how to build a Chemical Shield.
What you will master:
🌊 The Overflow Hack: How to retrofit your static rinse tanks with a simple PVC pipe weir to automatically skim off floating paint mist.
🚫 The "Silicone" Stop: Why silicone spray from the mold-release department causes "Fisheye" craters in your plating, and how to wash it off.
⚡ Live Entry SOP: A video guide on the exact voltage settings (3V vs 6V) to use when entering the Copper tank to guarantee 100% adhesion.
🧪 The "Water Break" Eye: Train your team to spot the difference between a "Clean Surface" and a "Deceptive Surface" in 5 seconds.
Sort
- Recommended
- Newest