
Pretreatment for Paint
This is the comprehensive "Pre-Paint Surface Treatment Masterplan" for Zinc Alloy.
The Golden Rule of Painting: "Paint is 80% Preparation."
If you paint directly onto raw die-cast zinc, it will peel. Zinc naturally forms a loose oxide layer ("White Rust") that prevents adhesion. You must remove this and replace it with a chemical "anchor" (Conversion Coating).
This plan is sized for 500 KG / Day (Approx. 50,000 zipper pulls/buttons) using the [QLQ System].
🛡️ Zinc Alloy Pre-Paint Treatment Masterplan (QLQ System)
Objective: Create a Class 0 Adhesion surface (Cross-Cut Tape Test Pass).
Method: Ultrasonic Dewaxing + Nano-Ceramic Conversion Coating (ZAP).
Capacity: 500 KG/Day (1 Shift, 10 Hours).
Process Type: Semi-Automatic Ultrasonic Line (Basket System).
Part I: Equipment Configuration (The Hardware)
To handle 500kg efficiently, you cannot use buckets. You need a linear tank line.
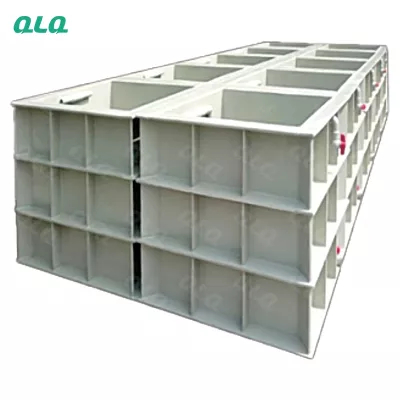
Ultrasonic Cleaning Line (5-Stage):
Tank Dimensions: $600 \times 600 \times 600$ mm (Approx. 200 Liters).
Material: SUS304 Stainless Steel (Heated).
Ultrasonic Power: 1500W – 2000W per tank (28kHz or 40kHz).
Filtration: Oil skimmer and circulating pump on Tank 1.
Drying Oven (Tunnel or Cabinet):
Type: Air Circulation Batch Oven or Mesh Belt Tunnel.
Temp: Capable of 150°C.
Inner Material: Stainless Steel (to prevent rust dust).
Water System:
RO Pure Water Machine: 500L/Hour. (Final rinse must be pure to prevent salt spots).
Baskets:
Type: Stainless Steel Mesh Baskets ($400 \times 400$ mm).
Load: ~10-15 KG per basket.
Part II: The Chemical List (QLQ System)
Sourcing: [QLQ Product] for performance; [Purchase Locally] for acids.
| Chemical Name | Function | Consumption Est. (Per Day) |
| 1. [QLQ] Liquid Wax Remover | Dissolves Polishing Wax | 2 – 3 Liters |
| 2. [QLQ] Ultrasonic Degreaser | Removes Oil/Dirt | 1 – 2 KG |
| 3. [QLQ] Zinc Activator (Acid) | Removes Oxide Skin | 0.5 – 1 KG |
| 4. [QLQ] Nano-Ceramic ZAP | Adhesion Promoter (Conversion) | 1 – 1.5 Liters |
| 5. [Purchase Locally] Sulfuric Acid | pH Adjustment | Minimal |
Part III: The Process Workflow (SOP) & Time Study
Throughput Calculation:
Total Target: 500 KG.
Batch Size: 15 KG / Basket.
Total Batches: ~34 Batches per day.
Cycle Time: 1 Batch every 15-18 minutes.
| Step | Process Name | Temp | Time | Chemical / Formula | Purpose |
| 1 | Hot Dewaxing (US) | 70-80°C | 5-8 mins | [QLQ] Wax Remover (3-5%) | Melts heavy polishing wax from logos/holes. |
| 2 | Fine Degreasing (US) | 60-70°C | 3-5 mins | [QLQ] Degreaser (30 g/L) | Removes oil film. Makes surface hydrophilic. |
| 3 | Flowing Rinse | RT | 1 min | Tap Water | Removes alkali residue. |
| 4 | Surface Activation | RT | 30-60 sec | [QLQ] Zinc Activator (1-2%) | Slightly etches the zinc skin. Removes oxidation. Crucial. |
| 5 | Flowing Rinse | RT | 1 min | Tap Water | Stop acid reaction. |
| 6 | Nano-Ceramic Conversion | RT - 35°C | 1-2 mins | [QLQ] Nano-ZAP (3-5%) | Creates a colorless, nano-scale "glue" layer. Replaces Phosphate. |
| 7 | Pure Water Rinse | 40-50°C | 1 min | RO Water (Conductivity <10µS) | Prevents water spots/stains under paint. |
| 8 | Dehydration Baking | 120°C | 20-30 mins | Hot Air | 100% Bone Dry. Drives out moisture from pores. |
Part IV: Personnel Configuration
Total Staff: 2 - 3 People
Line Operator (1 Person):
Responsibilities: Loading/Unloading baskets, operating the hoist (or manual transfer), checking temperature.
Chemical/Maintenance Tech (0.5 - 1 Person):
Responsibilities: Dosing chemicals, checking pH, skimming oil, maintaining the Ultrasonic generator.
QC & Staging (1 Person):
Responsibilities: Inspecting dried parts (Water Break Test), packing into clean trays for the Spray Room.
Part V: Master’s Precautions (The "Don't Fail" Rules)
1. The "Water Break" Test (Every 2 Hours)
Before the parts go into Step 6 (ZAP), lift a basket out of the rinse.
Pass: Water covers the zipper pull completely like a sheet.
Fail: Water beads up (like rain on a waxed car).
Action: If it fails, add more [QLQ] Degreaser or change the water in Tank 1. If you paint over oil, it peels 100%.
2. The "Touch of Death"
After Step 2, NO BARE HANDS.
Human skin has oil and salt. A fingerprint on a Zinc Alloy part will appear as a "Rust Fingerprint" under the clear lacquer 3 months later.
Rule: Operators must wear clean cotton or nitrile gloves.
3. Drying Temp Control
Do not exceed 150°C in the drying oven.
Why? Zinc Alloy crystal structure changes > 150°C (aging), and the conversion coating might degrade. 120°C is the sweet spot.
4. The "4-Hour" Time Limit
Once parts are treated and dried, they are "Active."
Rule: You must paint them within 4 hours. If they sit overnight (especially in humid weather), the zinc will re-oxidize, and the ZAP coating will absorb moisture. The paint will bubble.
Part VI: Daily Output Schedule (Example)
08:00: Turn on heaters (Tanks take 45 mins to heat up).
08:45: Chemical Check (pH and Concentration).
09:00: First Basket In.
09:20: First Basket Out (Dry). QC Check.
... Continuous Cycle ...
12:00: Lunch (Cover tanks to save heat/water).
17:00: Last Basket In.
17:30: Turn off Heaters. Skim Oil.
Total Output: ~510 KG.
🌟 Featured Album: The "Adhesion Anchor" Series
Description for the Blog/Guide Album:
⚓ The "Adhesion Anchor" Album: Why Paint Peels from Zinc (And How to Stop It)
Painting Zinc Alloy without Pre-treatment is like painting on glass with grease—it just slides off. This album teaches you the Chemical Architecture of a perfect bond.
What you will learn:
🧪 Nano-Ceramic vs. Phosphate: Why the old-school heavy phosphate sludge is dead. We introduce [QLQ Nano-ZAP], the invisible coating that increases paint grip by 300%.
🧼 The "Invisible Wax" Killer: Polishing wax hides in the text of your zipper logo. Learn how to tune your Ultrasonic Frequency to blast it out before it ruins your paint.
🔥 The Pre-Bake Secret: How drying your parts at the wrong temperature causes "Blistering" inside the paint oven later.
✋ The Glove Protocol: Why a single fingerprint on a pre-treated buckle is a $5.00 loss, and how to handle parts safely.
Sort
- Recommended
- Newest