
Gold electroforming
This is the "Rack E-Coat on Real Gold Operations Manual" (The Jewelry Shield).
The Challenge:
Adhesion: Gold is a "Noble Metal." It is chemically inert, meaning it hates bonding with other materials. E-Coat often peels off Real Gold like a sticker.
Appearance: Real Gold has a specific deep luster. Standard E-Coat creates a "plastic wrap" effect that cheapens the jewelry.
Color Shift: If you bake the E-Coat at 160°C, the Gold color often darkens or turns reddish due to oxidation of the underlying alloy or yellowing of the lacquer itself.
Here is the Master’s Standard for the highest-level jewelry finishing using the [QLQ System].
💍 Rack E-Coat on Real Gold Manual (The "Invisible Ceramic")
Target: 18K/24K Gold Plated Rings, Pendants, Luxury Hardware.
Goal: 4H Hardness, 100% Optical Clarity (Invisible), Zero Peeling.
System: High-Definition (HD) Cathodic Acrylic E-Coat.
Part I: The "HD" Chemistry (Jewelry Grade)
Standard Industrial E-Coat is too cloudy for gold. You must use "High Definition" Resin.
Standard Make-up for 500 Liters (Jewelry Line):
| Component | Amount | Function |
| DI Water (< 5 µS) | 350 Liters | Carrier. |
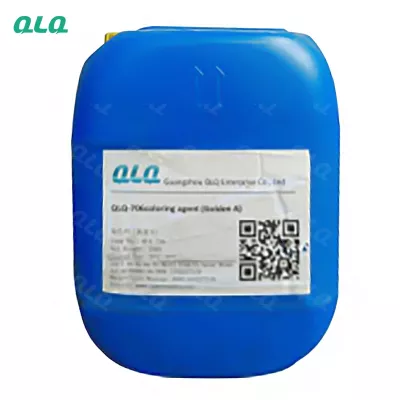
| [QLQ] HD Clear Resin | 150 kg | High Refractive Index. Matches metal reflection. |
| [QLQ] Adhesion Promoter | 5 – 10 Liters | Critical. Modification agent for inert surfaces (Gold). |
| [QLQ] Levelling Solvent | 10 Liters | Ensures 0% Orange Peel (Glass finish). |
Key Difference:
Standard E-Coat: Thickness 15-20 µm. (Looks thick).
[QLQ] HD E-Coat: Thickness 5-8 µm. (Looks invisible but is equally hard).
Part II: The Adhesion Protocol (The "Gold" Bond)
Gold does not oxidize, so the polymer has nothing to grab onto. You must force the bond.
Step 1: Electrolytic Passivation (The Primer)
Before E-Coat, the gold rack must pass through a specialized tank.
Chemical: [QLQ] Gold Passivation Salt (Chrome-Free).
Process:
Voltage: 5V - 10V (Cathodic).
Time: 30 seconds.
Mechanism: It creates a nano-scale conversion coating on the gold surface that is chemically compatible with the E-Coat resin.
Without this step, the E-Coat will fail the "Coin Scratch Test".
Step 2: Ultra-Pure Rinse
Conductivity: < 5 µS/cm.
Reason: Any salt residue on the gold will create a "blister" under the E-Coat during baking.
Part III: Operating Parameters (The Gentle Process)
| Parameter | Range | The Master's Target |
| Temperature | 26°C – 30°C | 28°C. (Stable). |
| pH Value | 5.8 – 6.2 | 6.0. |
| Voltage | 20 V – 50 V | Lower than Standard. Target 30V. |
| Time | 30 – 45 Seconds | Flash Coat. We want thin protection (6 µm). |
| Ramping | Soft Start | 0V $\to$ 30V over 10 seconds. |
| Anodes | SS 316 / Anolyte Cells | Clean anodes weekly. |
Part IV: The Curing Strategy (Low Temp)
The danger zone for Real Gold is > 150°C. The underlying copper diffuses, or the Nickel barrier oxidizes, changing the gold color.
The "Jewelry Cure" Profile:
Dehydration (Flash-off):
Temp: 60°C – 80°C.
Time: 10 Minutes.
Goal: Remove water slowly. If you boil the water, you get "Micro-bubbles" (Haze).
Curing (Cross-linking):
Temp: 135°C – 140°C. (Low Temperature Cure).
Time: 40 – 50 Minutes. (Longer time compensates for lower temp).
Result: The film cures fully hard (4H) but the gold color remains Bright Yellow, not "Baked Red."
Part V: Operations Workflow (SOP)
Gold Plating: (As per previous manual).
Gold Recovery: Drag-out rinse.
Passivation: [QLQ] Gold Passivate (Electrolytic).
DI Rinse: Ultra-pure water.
E-Coating: [QLQ] HD Clear Resin. 30V / 30s.
UF Rinse: Recycle the resin.
Final DI Spray: Remove droplets.
Air Knife: Blow dry (Diamond Racking angle).
Oven: Low Temp Cure (140°C).
Part VI: Master’s Troubleshooting (Gold E-Coat Specific)
| Defect | Visual Symptom | Root Cause | The Master's Fix |
| Peeling | Film peels like tape. | Adhesion Failure. | 1. Gold surface was "passive" (too clean). 2. Skipped Passivation Step. 3. Add [QLQ] Adhesion Promoter. |
| Yellowing | Clear coat looks amber. | 1. Oven too Hot (>150°C). 2. Resin pH too low. 3. Film too thick (>15µm). | 1. Lower Oven to 135°C. 2. Flush Anolyte cells. 3. Lower Voltage (Make film thinner). |
| Rainbows | Iridescent oil-slick look. | Film too Thin. | The coating is < 3µm (Light interference). Increase Voltage to 40V. |
| Cloudiness | Gold looks dull/foggy. | 1. Water Haze. 2. Wrong Resin. | 1. Dehydration step (80°C) was skipped. 2. Switch to [QLQ] HD Clear. Standard industrial E-coat is not clear enough. |
| Fat Edges | Thick ridge at bottom. | Solvent Imbalance. | Add [QLQ] Leveling Solvent. Increase Racking Angle. |
Part VII: Efficiency & Value
1. The "Invisible" Value
Sales Pitch: "Why is your Gold Plating more expensive?"
Answer: "Because we use [QLQ] HD Ceramic E-Coat. It makes the gold scratch-proof (4H) and sweat-proof (Anti-Tarnish) without looking like plastic. It lasts 2 years, not 2 months."
2. Bath Maintenance (The expensive mistake)
Contamination: Gold plating often uses Citric Acid. If you drag Citric Acid into the E-Coat, the pH crashes and the resin coagulates (turns to cheese).
Prevention: You MUST have a dedicated DI water station with a conductivity meter before the E-Coat tank. If Conductivity > 20 µS, the line stops.
🌟 Featured Album: The "Jewelry Shield" Series
Description for the Blog/Guide Album:
💍 The "Jewelry Shield" Album: E-Coating on Precious Metals
Putting plastic on gold sounds wrong, but it is necessary for longevity. The secret is making it invisible.
What you will master:
🧬 The "Noble" Bond: Why Gold refuses to stick to lacquer, and how the [QLQ Electrolytic Passivation] creates a molecular bridge for 100% adhesion.
🌡️ The 140°C Limit: Why baking your jewelry at standard industrial temps (160°C) is destroying your "Hamilton Gold" color, and how to cure Low & Slow.
👀 Optical Clarity 101: The difference between "Industrial Clear" and "[QLQ] HD Clear." See side-by-side photos of how refractive index affects the sparkle.
💧 The Rainbow Fix: How to tune your voltage to get exactly 6-8 microns, eliminating that ugly "oil slick" rainbow effect on rings.
Sort
- Recommended
- Newest