
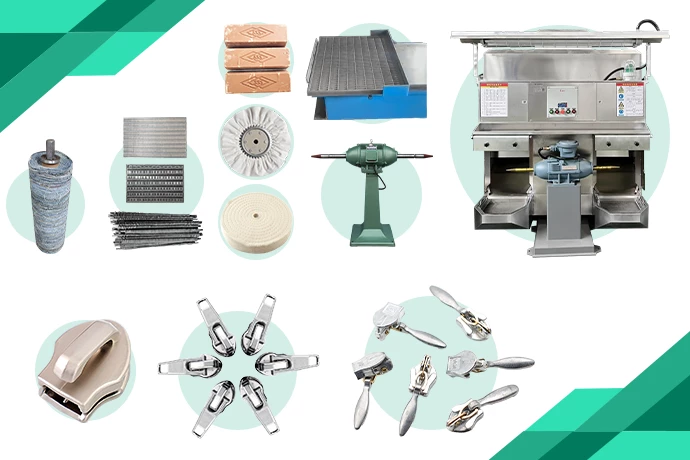
🛠️ Part I: The Toolkit (Wheels & Compounds)
Right Tool = 50% of the Job. Wrong Tool = 100% Reject.
| Step | Wheel Type | Compound (Wax) | Function | QLQ Recommendation |
| 1. Sanding | Abrasive Belt | N/A | Removing the "Gate" and heavy Parting Line. | [QLQ] Zirconia Belt (#240 / #320 Grit). |
| 2. Cutting (Rough) | Treated Sisal Wheel (Hard) | [QLQ] Purple Compound | Leveling the "Orange Peel" skin. | [QLQ] Red-Dip Sisal. Hardness 7/10. |
| 3. Coloring (Fine) | Cotton Wheel (Soft) | [QLQ] Super-Green | Mirror Shine. Removing Sisal marks. | [QLQ] 100% Cotton (60 Ply). Loose stitch. |
🪵 Part II: The "Wooden Stick" Jig (For Small Parts)
You cannot hold a 15mm Zipper Pull by hand against a 2400 RPM wheel. It will fly away or burn your fingers.
The "Magic Board" Design
Material: Hard Plywood or Bakelite Board.
Size: Width 4-5cm, Length 30-40cm (Handle shape).
The Pins: Drive steel nails into the board. Cut off the nail heads.
Spacing: The distance between nails matches the Zipper Pull loop.
Capacity: One board holds 10 – 20 pieces in a row.
Why use this?
Efficiency: You polish 20 pieces in one stroke, not 1 piece at a time.
Safety: Your hands are far away from the spinning wheel.
Quality: The board keeps the parts flat. No rounded edges.
🎡 Part III: Wheel Modification (The "Nose" Trick)
Standard wheels are flat. Zipper pulls have a raised "Nose" (Bridge) that holds the puller. A flat wheel will cut the nose flat and miss the wings.
How to "Groove" the Wheel:
Mount the Wheel: Put the Sisal wheel on the motor. Spin it.
The Rake: Use a sharp metal rake or an old saw blade.
The Cut: Press the rake into the center of the spinning wheel face.
Result: Create a Deep V-Groove or U-Channel in the middle of the wheel.
Operation Strategy:
The Nose: Rides inside the groove (protected).
The Wings: Ride on the high spots of the wheel (polished).
Benefit: You polish the flat face perfectly without destroying the bridge shape.
👨🔧 Part IV: Step-by-Step Operation (The Master's Moves)
Step 1: The Belt Sand (Deburring)
Action: Hold the zipper pull against the #240 belt.
Target: Only the Gate Point and the Side Parting Line.
Rule: NEVER touch the main face of the puller with the belt. It creates deep scratches that plating cannot hide.
Step 2: The "Cut" (Sisal Wheel + Purple Wax)
Setup: Use the Wooden Jig (loaded with 10 parts).
Waxing: Tap the [QLQ] Purple Compound on the wheel for 1 second.
The Pass:
Hold the board horizontal.
Press the parts against the wheel (Below center line).
Move Left $\leftrightarrow$ Right slowly.
Pressure: Medium. Zinc is soft. If you push too hard, you drag the metal.
Check: Look at the reflection. The "Orange Peel" (bumpy skin) must be gone.
Step 3: The "Color" (Cotton Wheel + Green Wax)
Setup: Same Jig. Switch to Cotton Wheel.
Waxing: Tap [QLQ] Super-Green lightly. Do not over-grease.
The Pass:
Polish vertically $\updownarrow$ (Cross-polish against the Sisal lines).
Pressure: Light. Just a "Kiss".
Goal: Remove the swirl marks from Step 2.
Safety: Do not dwell. High friction heat causes "Clouding" on Zinc.
🚦 Part V: The "Golden Hands" Rules (Do's and Don'ts)
1. The Heat Limit
Risk: Zinc melts at ~385°C, but surface structure changes at >150°C.
Sign: If the part turns Blueish-Cloudy or Yellow after polishing, you burned it.
Fix: Use less pressure. Polish faster.
2. Logo Preservation
Risk: Polishing washes out the sharp text of the logo (e.g., "YKK" becomes blurry).
Fix:
Use a Harder Wheel (Stitched Cotton) for logos.
Polish Across the text, not Parallel to it.
Limit polishing time to < 2 seconds on the logo face.
3. The "Drag" Zone
Safety Rule: Always polish on the Bottom Quadrant (4 o'clock to 7 o'clock position) of the wheel.
If you polish on the top, the wheel will grab the Jig and throw it at your face.
4. Wax Management
Error: Too much wax turns into a black solid rock in the corners.
Result: The Ultrasonic cleaner cannot remove it. Plating blisters.
Fix: "Less is More." Apply wax to the wheel frequently, but in tiny amounts.
🕵️ Part VI: Troubleshooting for the Operator
| Defect (Visual) | What did the Operator do wrong? | How to Fix |
| "Comet Tails" (Long scratches) | Dirty Wheel. | Rake the wheel to remove embedded metal grit. |
| "Wavy Surface" | Too much pressure on Step 2. | Hold the Jig steady. Let the compound cut, not your muscle. |
| "Black Holes" | Wax packed into the logo. | Too much wax applied. Use [QLQ] Liquid Compound spray if available. |
| "Blown Corners" | The square edge is now round. | Polishing "Into the edge". Always polish "Off the edge" (Wheel spins away from the corner). |
| "White Patches" | Pores opened up. | The die-casting was bad (porous inside), and you polished too deep, exposing the sponge. |
📝 Experience Share (The Polishing Master's Wisdom)
The "Finger" Protection
If you are polishing small sliders without a jig (hand-holding):
Do NOT wear cotton gloves. If the wheel grabs the glove, it breaks your finger.
Use: [QLQ] Safety Tape (Self-adhesive green tape). Wrap it around your fingertips. It protects from heat and abrasion but tears easily if the wheel grabs it.
The "Wheel Break-In"
A new cotton wheel is too fluffy. It does nothing.
Action: When you mount a new wheel, use a heavy stone or rake to "Dress" it while spinning. Remove the loose threads until the surface is flat and dense. Then apply wax.
The "Stacking" Logic
When placing polished parts in the tray:
Never throw them. Zinc is soft.
Use: Egg-crate foam trays.
Rule: "One part, one hole." If they touch, they scratch. The Master Polisher respects his own work.