
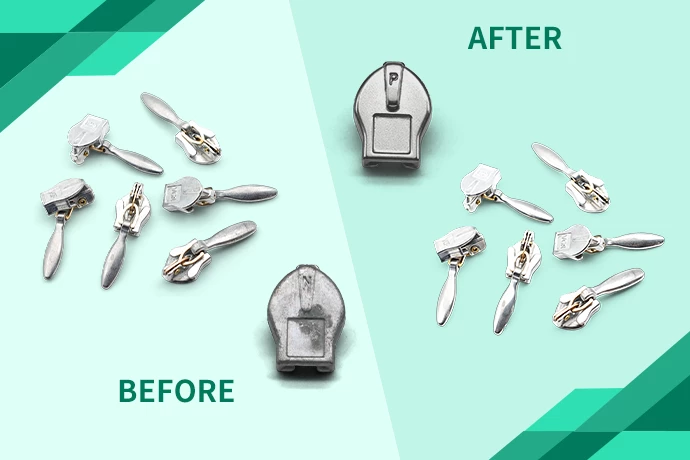
Surface Finishing & Pre-treatment Masterplan (QLQ System)
Goal: Transform raw die-castings (Zinc) and stamped parts (Iron/SS) into smooth, mirror-like surfaces ready for high-end plating.
Scope: Deburring (Deflashing), Smoothing, Fine Polishing, and Ultrasonic Cleaning.
Sourcing Strategy:
Equipment (Tumbling Machines): [Purchase Locally / Recommended Suppliers].
Consumables (Media/Stones): [Purchase Locally] (Ceramic, Plastic, Porcelain, Corn Cob).
Chemical Compounds (Grinding Fluids, Polishing Pastes): [QLQ Product] (Crucial for speed and brightness).
Phase I: Process Flow & Equipment Selection
1. Zinc Alloy (Zipper Pulls, Buckles)
Characteristics: Soft metal. Easy to deform. High requirement for surface smoothness.
Recommended Equipment: High-G Centrifugal Disc Finisher (for speed) or Vibratory Bowl Finisher (for delicate parts).
The 3-Step Process:
Coarse Grinding (Deflashing): Removing parting lines and burrs.
Fine Polishing (Smoothing): Closing surface pores and creating a semi-bright finish.
Ultrasonic Degreasing: Removing polishing wax/paste residue.
2. Iron & Stainless Steel (Buttons, Rivets)
Characteristics: Hard metal. Burrs are sharp and difficult to remove. Iron rusts easily during tumbling.
Recommended Equipment: Rotary Barrel Tumbler (aggressive) or Vibratory Bowl.
The Process:
Heavy Deburring: Aggressive cutting.
Burnishing: Using steel media to peen the surface for brightness.
Phase II: Detailed Operational SOP
Step 1: Deburring / Cutting (Rough Finishing)
Objective: Remove die-casting flash (Zinc) or stamping burrs (Iron/SS).
Media Selection:
Zinc: Resin bond cones (Plastic Media) – Gentle cutting.
Iron/SS: Ceramic triangles (Fast cutting).
Chemicals:
[QLQ Product] Heavy-Duty Grinding Compound: Accelerates cutting and keeps media clean.
Operational Details:
Ratio: 3 parts Media : 1 part Workpieces (by volume). Never overload workpieces or they will hit each other.
Water Level: Just covering the load (Vibratory) or 50% level (Rotary).
Time: 2–4 hours (depending on burr size).
QC Check: Visual inspection under 10x magnification. No visible parting line allowed.
Step 2: Fine Polishing / Lustering
Objective: Turn the matte surface into a glossy, smooth surface (Ra < 0.1µm).
Media Selection:
Zinc: High-density Porcelain balls (White) or Zirconia beads.
Iron/SS: Stainless Steel balls (Satellite/Ball mix) for burnishing.
Chemicals:
[QLQ Product] High-Gloss Polishing Liquid: Provides lubrication and chemical brightening.
[QLQ Product] Anti-Rust Compound (For Iron only): Mandatory to prevent flash rusting during the process.
Operational Details:
Time: 30–60 minutes (Centrifugal) or 2–3 hours (Vibratory).
Critical Note: The water must flow through continuously (Flow-through system) to flush out dirt, OR be changed every cycle. Dirty water = Dull finish.
Step 3: Drying (Optional but Recommended)
If parts are not plated immediately, they must be dried.
Method: Heated Vibratory Dryer using Corn Cob or Walnut Shell grit.
Chemicals: Add [QLQ Product] Polishing Paste to the corn cob to add a final "Jewelry Wipe" effect.
Step 4: Pre-Plating Cleaning (Ultrasonic)
Note: Even after tumbling, parts have polishing residue and microscopic dust.
Equipment: 3-Stage Ultrasonic Cleaning Machine.
Chemicals:
[QLQ Product] Ultrasonic Wax Remover: Specifically dissolves the binders in polishing compounds.
Process:
Tank 1: Ultrasonic Clean (60°C, 5-10 mins).
Tank 2: Ultrasonic Rinse (50°C).
Tank 3: Pure Water Spray.
Phase III: Quality Control & Inspection Standards
Before sending parts to the plating workshop, the "QC Gate" must check:
The "White Cloth" Test:
Wipe the part with a clean white cloth after ultrasonic cleaning.
Pass: No black or grey residue.
Fail: Residue indicates poor ultrasonic cleaning $\rightarrow$ Will cause peeling in plating.
The "Finger Nail" Test (Deflashing):
Run a fingernail across the parting line/edge.
Pass: Smooth transition.
Fail: Nail catches on a burr $\rightarrow$ Will cause "High Current Density Burning" (roughness) during plating.
Water Break Test (Degreasing):
Dip part in water and remove.
Pass: Water film covers the surface continuously for 30 seconds.
Fail: Water beads up like on a waxed car $\rightarrow$ Oil is still present.
Phase IV: Expert Maintenance Tips (Preventing Common Failures)
Media Grading:
Stones/Media wear down and get smaller. Small stones can get lodged/stuck in the holes of zipper pulls or buttons.
Action: Screen/Sieve the media weekly to remove undersized stones.
Compound Concentration:
Using too much [QLQ Product] Polishing Liquid is wasteful; using too little causes media glazing (stones stop cutting).
Action: Use an automatic dosing pump (e.g., 50ml every 15 mins).
Iron Rusting:
Iron buttons can rust inside the polishing barrel if the pH drops.
Action: Ensure [QLQ Product] Anti-Rust Compound keeps the solution pH > 9.0.