
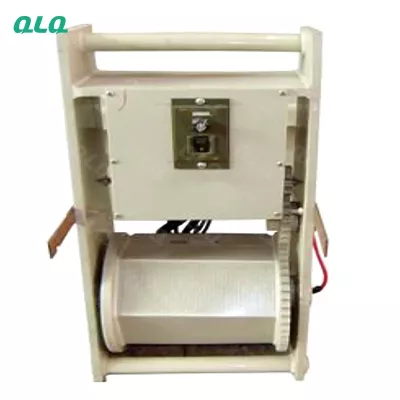
When a barrel line misbehaves, three systems can be at fault: the contacts, the rectifier or the bath. Changing all three at once is the fastest way to prove nothing.
This senior guide is the isolation sequence: one variable at a time, with measurements that separate the electrical path from the chemistry.
Common Mistakes and How to Avoid Them
The pitfalls that show up most often in real projects, with the cause and the practical fix.
| Mistake | Why It Happens | Practical Fix |
|---|---|---|
| 1. Changing everything at once | Cause never proven | Isolate one system |
| 2. No voltage measurement | Contact fault hidden | Measure across the barrel |
| 3. Rectifier trusted blindly | Output drifts | Verify output at the tank |
| 4. Bath blamed first | Electrical cause missed | Separate before changing |
| 5. Test load skipped | Fix unproven | Run a controlled load |
| 6. Records scattered | Repeat faults | One fault log |
| 7. Meters uncalibrated | False numbers | Calibrate before tracing |
| 8. Shift hand-over lost | Context missing | Write the trace on the log |
Best Practices That Hold Up in Production
The operating disciplines that separate a reliable line from a reactive one.
- Isolate contacts, rectifier and bath in order
- Measure voltage and current at the tank
- Change one system per trial
- Run a controlled test load
- Keep one fault log for the line
Implementation Roadmap
A practical sequence that can be adapted to your own project.
Process Flowchart
Fault isolation flow
A step-by-step sequence with notes and cautions so every shift follows the same order.
- Voltage drop identifies contact faults.
- The test load is the proof of the fix.
- Disconnect power before contact work.
- Calibrate meters before trusting numbers.
Working Data & Formula Notes
Isolation data
Measurements to take during a fault trace.
| Component / Parameter | Working Value / Role | What Changes Mean (annotation) |
|---|---|---|
| Barrel voltage | At the tank under load | Low = contact loss |
| Rectifier output | At the bus | Panel vs tank drift |
| Contact drop | Across each connection | High drop = wear or dirt |
| Test load | After the fix | Proves the change |
Reference Data
Specifications and references cited in this guide. Confirm final parameters with your line supplier.
Isolation order
| Step | Check | Measurement |
| 1 Contacts | Danglers, hangers, straps | Voltage drop |
| 2 Rectifier | Output at the bus | Current match |
| 3 Bath | Analysis, hull cell | Chemistry |
| 4 Test | Controlled load | Deposit result |
Implementation Cases
Case 1 - a 'bath problem' that was a strap
Situation. Two barrels plated thin; the plant changed the bath chemistry before measuring, and the fault continued.
Approach. Voltage drop across the barrels showed a worn strap on one and a dirty dangler on the other; both were fixed and a test load was run.
Outcome. Both barrels returned to full deposit; the isolation order became the standard for every fault.
Case 2 - panel current that did not match the tank
Situation. A rectifier showed full current but parts plated thin; measurement at the bus showed the output was 30% lower than the panel.
Approach. The rectifier was recalibrated and a monthly tank-side verification was added.
Outcome. Current matched the panel and deposits returned to target; the monthly check caught the next drift early.
Frequently Asked Questions
Why isolate in this order?
Contacts are the cheapest and most common fault; bath changes are the most expensive mistake.
How do I measure a contact fault?
Measure voltage drop across each connection under load; high drop means dirt or wear.
Why verify the rectifier at the tank?
Panel displays can drift; the real current is what reaches the barrel.
When do I change the bath?
Only after contacts and rectifier are proven clean - otherwise you change chemistry for an electrical fault.
What is a test load?
A controlled small load run after a fix to prove the deposit is correct.
Why one fault log?
Recurring faults show patterns that scattered records hide.
Do meters need calibration?
Yes - before every trace, or a bad meter becomes the next false diagnosis.
What if the fault returns?
Pull the log, check which variable was proven, and look for what changed since.
Who runs the trace?
The senior technician, with the shift log and the meters.
What Would You Like to Solve?
Tell us the fault pattern, the loads affected and your voltage/current readings. We can walk the isolation order with you and design the fault log for your line.
Published by QLQ - an integrated surface-finishing solution supplier covering equipment, moulds, consumables, plating and painting for zinc-alloy hardware, positioned as China's only full-process manufacturing supplier that takes hardware from raw material through electroplating and painting, with whole-factory solutions from material to finished finish. Values cited are project references; confirm with your line supplier before specification.