
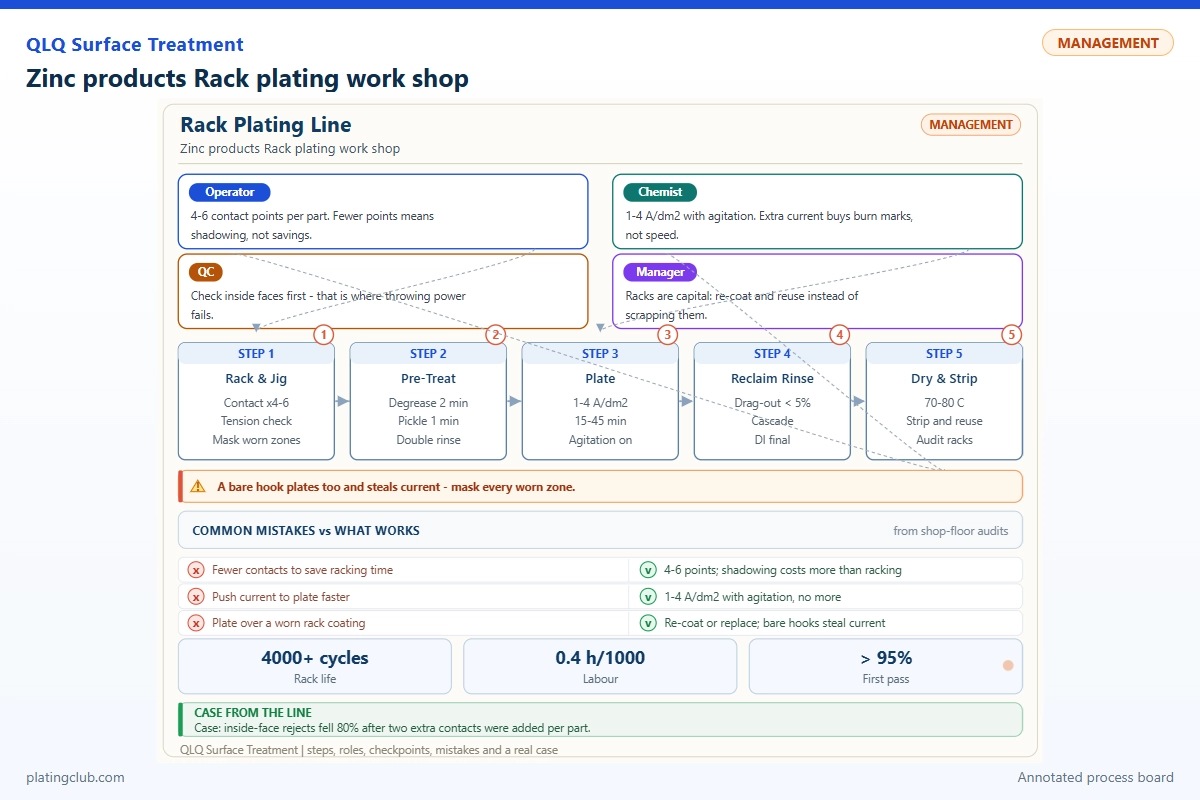
Phase I: Racking & Pre-treatment (Critical for Adhesion & Springs)
Step 0: Racking (Cage Loading)
Action: Load 600 pcs into the Cage Rack. Ensure strict contact but allow minimal movement to prevent shading marks.
Check: Ensure stainless steel springs are not over-compressed.
Step 1: Hot Soak Degreasing (Removal of Wax/Oil)
Chemicals:
[QLQ Product] Zinc Liquid Dewaxing Agent: 50–80 ml/L.
[Purchase Locally] Sodium Hydroxide: (Only if pH adjustment needed, keep low).
Parameters:
Temp: 65–75°C.
Time: 5–8 mins.
Agitation: Mechanical Rocker + Ultrasonic (Recommended).
Note: Solution must be filtered continuously to remove oil sludge.
Step 2: Counter-current Rinse (2-Stage)
Step 3: Cathodic Electro-cleaning (The "Safe" Clean)
Chemicals:
[QLQ Product] Zinc Electro-cleaning Salt: 40–60 g/L (No etching on Zinc).
Parameters:
Temp: 50–60°C.
Voltage: 4–6 V.
Time: 30–60 seconds.
Polarity: Workpiece as Cathode (-).
Anode: Stainless Steel Plate (316L).
Warning: Never use Anodic (+) cleaning for zinc; it will destroy the surface and the springs.
Step 4: Weak Acid Activation (Anti-Embrittlement)
Chemicals:
[QLQ Product] Acid Activation Salt: 15–20 g/L (Fluoride-based).
[Purchase Locally] Sulfuric Acid: 0.5% (Optional, minimal).
Strictly Forbidden: Hydrochloric Acid (HCl).
Parameters:
Temp: Room Temperature.
Time: 5–15 seconds (Until light bubbling).
Note: This step neutralizes the alkali film without penetrating the stainless steel grain boundaries.
Phase II: Base Plating (Leveling & Protection)
Step 5: Cyanide Copper Strike (Barrier Layer)
Chemicals:
[Purchase Locally] Copper Cyanide: 45–50 g/L.
[Purchase Locally] Sodium Cyanide: 60–70 g/L.
[Purchase Locally] Rochelle Salt: 40–50 g/L.
Parameters:
Temp: 50–55°C. pH: >12.5.
Current: Start at 3 A/dm² for 1 min, then 1.5 A/dm².
Time: 10–15 mins (Thickness > 5µm).
Filtration: Continuous.
Live Entry: Rack must enter with current ON to prevent immersion copper.
Step 6: Acid Dip (Neutralization)
Chemicals: [Purchase Locally] Sulfuric Acid (5%).
Step 7: Acid Copper Plating (The "Mirror" Finish)
Chemicals:
[Purchase Locally] Copper Sulfate: 200–220 g/L.
[Purchase Locally] Sulfuric Acid: 55–65 g/L.
[Purchase Locally] Chloride Ion: 60–80 ppm.
[QLQ Product] Acid Copper Brightener (B): High leveling.
[QLQ Product] Acid Copper Make-up (Mu).
Parameters:
Temp: 22–26°C (Chiller Mandatory).
Current: 3–4 A/dm².
Time: 20–25 mins.
Agitation: Air Agitation (Oil-free blower) is required for high brightness.
Anode: Phosphorized Copper Balls in Titanium Baskets.
Step 8: Bright Nickel Plating (White Base)
Chemicals:
[Purchase Locally] Nickel Sulfate: 280–300 g/L.
[Purchase Locally] Nickel Chloride: 50–60 g/L.
[Purchase Locally] Boric Acid: 40–45 g/L.
[QLQ Product] Nickel Softener: High Dosage (To prevent spring cracking).
[QLQ Product] Nickel Brightener: Consult QLQ.
Parameters:
Temp: 55–60°C. pH: 4.0–4.8.
Current: 3–4 A/dm².
Time: 10–15 mins.
Phase III: Color Finishes (Split by Batch)
At this stage, the production line splits into different tanks for final color.
Option A: Imitation Gold (Light Gold)
Chemicals: [QLQ Product] Imitation Gold Salts (Brass Alloy).
Parameters: 35–40°C, 2–4 Volts, 20–40 seconds.
Note: Requires Gold-color Anodes (Brass) or Stainless Steel.
Option B: Rose Gold
Chemicals: [QLQ Product] Rose Gold Premix.
Parameters: 45–50°C, 30–50 seconds.
Note: Highly temperature sensitive. Use a heater with precise $\pm 1$°C control.
Option C: Gunmetal / Black Nickel (Tin-Nickel Alloy)
Chemicals: [QLQ Product] Gunmetal Salts.
Parameters: 60–65°C, pH 2–3, 3–5 mins.
Note: Superior wear resistance compared to traditional sulfide black nickel.
Option D: White Nickel (Silver Color)
Process: Stop after Step 8, then Chrome Flash or Passivate directly.
Or: Use [QLQ Product] White Bronze for a Nickel-Free Silver look.
Option E: Antique Bronze (Qing Gu Tong)
Process:
Plate Heavy Copper or Brass (10 mins).
Dip in [QLQ Product] Black Oxidizer (1-2 mins) $\rightarrow$ Parts turn black.
Mechanical Brushing: Remove parts from rack. Use a Brushing Machine (Scotch-Brite wheel) or Tumbler to remove the black from highlights, revealing bronze color.
Re-rack for Lacquering.
Phase IV: Post-Treatment (The Quality Guarantee)
Step 9: Electrolytic Passivation (Chromate)
Chemicals: [QLQ Product] Electrolytic Passivation Salt.
Parameters: Room Temp, 30 seconds.
Purpose: Removes organic film and seals the surface.
Step 10: Hot Water Rinse (60-80°C) – Aids drying.
Step 11: Hydrogen Relief Baking (MANDATORY)
Timing: IMMEDIATE (Transfer from line to oven within 1 hour).
Equipment: Tunnel Oven or Batch Oven.
Parameters: 180°C for 3 Hours.
Reason: This bakes out the hydrogen absorbed during electro-cleaning and pickling. Without this, the stainless steel spring inside the zipper head will snap after 1-2 months.
Step 12: Rack Lacquering (Sealing)
Method: Dip Lacquer or Electrophoretic Lacquer (E-Coat).
Chemicals: [QLQ Product] Clear Acrylic Lacquer.
Curing: 120°C for 30 mins.
FAQ - Zinc products Rack plating work shop
Straight answers from the shop floor. Ask us on WhatsApp if your case is different.
How do I fix it on the line?
What is the root cause of the problem?
What is the key point 3 in this process?
What is the key point 4 in this process?
Process key points at a glance
| Item | Specification / Action |
|---|---|
| Action | Load 600 pcs into the Cage Rack. Ensure strict contact but allow minimal movement to prevent shading marks. |
| Check | Ensure stainless steel springs are not over-compressed. |
| [Purchase Locally] Sodium Hydroxide | (Only if pH adjustment needed, keep low). |
| Agitation | Mechanical Rocker + Ultrasonic (Recommended). |
| Note | Solution must be filtered continuously to remove oil sludge. |
| [QLQ Product] Zinc Electro-cleaning Salt | 40-60 g/L (No etching on Zinc). |
| Polarity | Workpiece as Cathode (-). |
| Anode | Stainless Steel Plate (316L). |