
Plating en cuivre acide dans un baril
This is the "Barrel Acid Copper (Bright Copper) Operations Manual".
While Cyanide Copper provides adhesion, Acid Copper provides the "Meat" (Thickness) and the "Mirror" (Brightness).
The Mission: To level out the rough surface of the die-casting and build a thick, ductile layer that prevents the Zinc from migrating into the final Nickel/Gold finish.
The Challenge: In a barrel, parts tumble against each other. If the chemical formula is wrong, the parts will stick together, burn on the edges, or stay dull in the center.
Here is the Master’s Standard for running a high-performance Barrel Acid Copper tank using the [QLQ System].
💎 Barrel Acid Copper Plating Manual (The Leveling Layer)
Target: Zinc Alloy Zipper Pulls (after Cyanide Copper strike).
Goal: Mirror Brightness, High Leveling, No Burning.
Chemical Type: Sulfate-based Acid Copper with "High-Throw" Barrel Additives.
Part I: Tank Make-up Formula (The Recipe)
Standard Make-up for 1,000 Liters (1 Ton).
| Chemical Component | Concentration | Amount (kg/1000L) | Function |
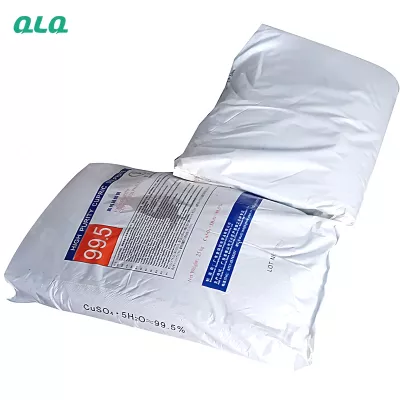
| Copper Sulfate (CuSO₄·5H₂O) | 180 – 220 g/L | 200 kg | Source of Copper Metal. |
| Sulfuric Acid (H₂SO₄) | 55 – 65 g/L | 60 kg (approx 33L) | Conductivity & Anode Dissolution. |
| Chloride Ion (Cl⁻) | 60 – 80 ppm | ~80-100 ml HCl | The Bridge. Connects brightener to the metal. |
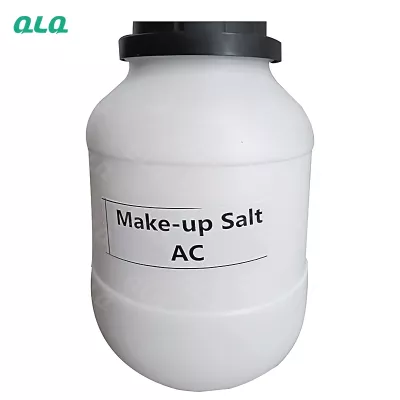
| [QLQ] Barrel Mu (Make-up) | 6 – 8 ml/L | 6 – 8 Liters | Base Carrier / Wetting Agent. |
| [QLQ] Barrel A (Carrier) | 0.5 – 1 ml/L | 0.5 – 1 Liter | Grain Refinement / Ductility. |
| [QLQ] Barrel B (Brightener) | 0.3 – 0.5 ml/L | 0.3 – 0.5 Liter | Leveling / Shine. |
Critical Note on Anodes: You MUST use Phosphorized Copper Balls (0.04% - 0.06% Phosphorus).
Why? Phosphorus creates a black film on the ball that prevents copper sludge from forming. If you use pure copper wire/plate, the tank will become rough (sandpaper effect) in 2 days.
Part II: Operating Parameters (The Cockpit)
| Parameter | Range | The Master's Target |
| Temperature | 20°C – 30°C | 25°C (Requires Chiller. >30°C = Dull/Foggy). |
| Voltage | 6 V – 10 V | Start Low (4V), Ramp to 8V. |
| Current Density | 0.3 – 0.8 A/dm² | Depends on surface area. |
| Barrel Rotation | 6 – 10 RPM | 8 RPM (Fast enough to mix, slow enough to connect). |
| Plating Time | 45 – 60 mins | 45 Minutes (Target 10-15 microns). |
| Agitation | Filtration | Continuous Circulation (No Air agitation in Barrel). |
| Baumé (Density) | 20 – 24 °Bé | Check weekly. |
Part III: Operational Key Points (The "Secret Sauce")
1. Chloride Control (The "80 ppm" Rule)
The Issue: Chloride is not consumed by plating, but it is lost through drag-out.
Low Cl (< 40 ppm): Plating becomes "Stepped" (Rough edges) and burns easily.
High Cl (> 120 ppm): Plating becomes dull, grey, and rough.
The Master's Fix: Add Hydrochloric Acid (HCl) drop by drop. Never guess. Analyze it weekly.
2. Temperature Management (The "Summer" Killer)
The Physics: Acid Copper generates heat (Resistance).
The Rule: If the tank hits 32°C, the Brightener (B-Agent) breaks down chemically.
Result: You will add liters of expensive [QLQ] Brightener, but the parts will stay fogged.
Action: Ensure the Titanium Cooling Coil or External Chiller is running before the shift starts.
3. The "LCD" Boost (Low Current Density)
The Challenge: In a barrel, the parts deep in the center of the pile get very little electricity (Low Current).
The Solution: Use [QLQ] LCD Booster.
Effect: It helps the copper deposit in the low-current areas, ensuring the center parts are just as bright as the outside parts.
4. Anode Maintenance
Check: Open the Titanium Baskets every week.
Status: The copper balls should be black (Phosphorus Film).
Action: If they are "Orange/Shiny," you are missing Chloride or Phosphor is too low. If "Bridging" (Stuck), ram them down with a titanium rod.
Part IV: Tank & Solution Maintenance Schedule
Daily Routine:
Hull Cell Test (The "Eyes"):
Run a 267ml panel at 1 Amp / 10 Mins.
Check: Is the LCD area (right side) cloudy? -> Add [QLQ] Carrier (A).
Check: Is the HCD area (left side) burnt? -> Copper too low or Temp too low.
Filter Pressure:
Acid copper creates sludge. If pressure > 1.5 Bar, clean the bag immediately.
Weekly Routine:
Analyze Copper & Sulfuric Acid:
Copper Sulfate increases over time (Anode dissolves faster than cathode plates). You may need to remove solution and add water.
Sulfuric Acid decreases (drag-out). Add acid to maintain conductivity.
Clean Dangler Cables:
Acid copper builds up thick "trees" on the dangler knobs. Hammer them off. Thick buildup steals current from the zipper pulls.
Monthly Routine:
Carbon Treatment (The "Refresh"):
Brighteners break down into organic pollutants (TOC). High TOC = Brittle plating (Cracking).
Action: Add 2kg Activated Carbon Powder. Stir 2 hours. Settle. Filter.
Result: The solution becomes "Crisp" and efficient again.
Part V: Master’s Troubleshooting (Real Experience)
| Defect | Visual Symptom | Likely Cause | The Master's Fix |
| "Nesting" / Sticking | Flat parts plated together. | 1. Rotation too slow. 2. Parts overload. 3. Brightener overdose. | 1. Increase RPM. 2. Add Steel Media. 3. Carbon treat. |
| Roughness | Sandpaper / Particles. | 1. Broken Anode Bag. 2. High Chloride. 3. Low Phosphorus Anode. | 1. Inspect bags. 2. Precipitate Cl using Zinc Dust. 3. Check Anode balls. |
| Dull / Foggy | Not mirror bright. | 1. High Temp (>30°C). 2. Low Brightener (B). 3. Low Chloride. | 1. Turn on Chiller. 2. Hull Cell test. 3. Add HCl. |
| Pitting | Tiny pinholes. | 1. Low Wetting Agent (Mu). 2. Organic Contamination. | 1. Add [QLQ] Mu Agent. 2. Carbon Treatment. |
| Burnt Edges | Dark/Rough on edges. | 1. Copper too low. 2. Voltage too high. | 1. Add Copper Sulfate. 2. Lower Rectifier Volts. |
Part VI: Efficiency & Cost Control
1. The "Brightener Balance"
Mistake: Operators think "More Brightener = Better."
Reality: Too much brightener causes "Brittle" plating. When you tumble the parts, the copper cracks.
Rule: Add brightener by Ampere-Hours (A·h) using an automatic dosing pump.
Standard: 150-200 ml per 1000 A·h.
2. Copper Recovery
Money Saver: Acid Copper is cheap, but Waste Treatment is expensive.
Action: Install a "Static Rinse" (Drag-out tank) immediately after the plating tank.
Use: Use this water to top-up the evaporation in the main plating tank. This recovers 80% of the copper sulfate.
🌟 Featured Album: The "Liquid Mirror" Series
Description for the Blog/Guide Album:
💎 The "Liquid Mirror" Album: Achieving Perfect Leveling in Barrels
Acid Copper is the "Foundation" of the mirror finish. If this layer is rough, your Nickel and Gold will be rough. This album teaches you how to maintain the perfect chemical balance.
What you will master:
🧪 The Chloride Key: Why 80 ppm of Chloride makes the difference between "Muddy" copper and "Mirror" copper, and how to measure it without a lab.
🌡️ The "Summer Heat" Hack: How to manage tank temperature when you don't have a big chiller (Hint: It involves ice blocks and flow timing).
🔋 The Phosphor Ball Secret: Why using cheap scrap copper wire as anodes is destroying your bath, and why you must use the black-film Phosphor balls.
🛁 Carbon Treatment 101: A step-by-step video on how to "scrub" your solution clean of organic trash without losing your metal content.
👉 Get the Mirror Finish every time. Download the Liquid Mirror Guide now!
Trier
- Recommandé
- Plus récent