
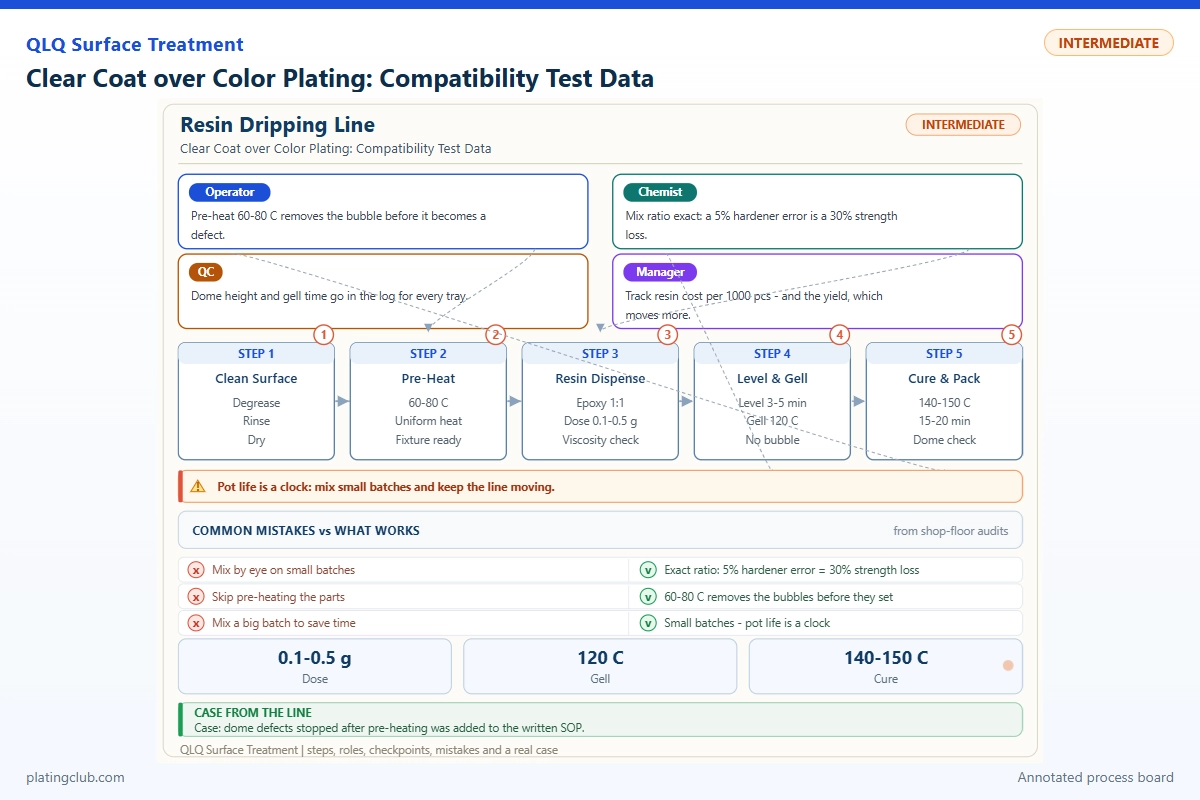
Resin Dripping / Intermediate Technician / Compatibility Qualification
Clear Coat over Color Plating: Compatibility Test Data
A transparent resin can preserve a decorative finish, but it cannot repair a weak plating stack. For zinc-alloy bag fittings, zipper pullers and recessed emblems, qualification must answer three separate questions: does the liquid wet the finish, does the cured resin remain attached, and does the assembly retain its color after exposure?
This guide addresses localized epoxy resin dripping, not an interchangeable spray-lacquer process. It provides a traceable material reference, a controlled coupon comparison and practical shift controls for technicians who already operate a finishing line independently.
1. What the Available Data Can Actually Prove
No verified QLQ clear-resin-over-color-plating coupon report was available in the consulted knowledge base. Consequently, the comparison matrix below is an experimental work sheet, not completed test results. Manufacturer-published resin properties are identified separately; they do not establish adhesion or corrosion performance on your plated hardware.
The local QLQ note on zinc-alloy plating defects identifies incomplete cleaning, trapped residues, casting porosity and interlayer weakness as relevant causes of blistering, discoloration and peeling. Those mechanisms justify upstream checks before changing resin chemistry. Its older plating remedies are not a clear-coat recipe and should not be copied into this process.
Record the entire stack: casting batch, copper and nickel underlayers, decorative finish chemistry, passivation or existing sealer, rinse history and drying cycle. “Gold color” is not a chemical specification. Metallic alloy plating, a conversion finish, tinted lacquer and PVD require separate compatibility decisions.
Source: local QLQ knowledge-base file, Zinc-Alloy Electroplating Defect Analysis and Treatment Solutions, under the surface-treatment / zinc-alloy-plating folder; source metadata: IMA knowledge base, updated 2026-07-28.
2. Published Material Reference and Coupon Experiment
One public reference is Eli-Chem MasterCast 1-2-1, a transparent epoxy coating system. The following values are manufacturer-published properties, not independent plated-substrate tests. The brochure does not provide specimen-level raw data or a color-plating salt-spray result. Confirm the current technical sheet before purchasing or qualifying this reference material.
| Reference condition | Test condition | Mixed viscosity | Practical working time | Hardness | Plated film thickness / salt spray |
|---|---|---|---|---|---|
| Temperature reference A | 23°C; working-time sample 250 g | 4,400–4,700 mPa·s | 15–20 min | Not reported at this condition | Not reported |
| Temperature reference B | 25°C; working-time sample 250 g | 3,700–3,900 mPa·s | 10–12 min | Shore D 75–78 after 24 h at 25°C | Not reported |
Source: Eli-Chem MasterCast technical brochure. These numbers demonstrate why a small temperature change deserves attention; they cannot be transferred to another resin.
For the plant experiment, select three independent plating batches. From each batch prepare at least three specimens per condition and endpoint; destructive tests need separate specimens. Include flat plated witness panels and actual recessed hardware. Randomize chamber positions and keep an unexposed reference from each batch.
| Specimen group | Batch comparison | Test condition | Resin thickness | Hardness / adhesion | Salt-fog record |
|---|---|---|---|---|---|
| C0: uncoated color plating | B1 / B2 / B3 | Matched rinse and drying; no added resin | 0 added resin | Resin hardness not applicable; inspect plating integrity | Measure corrosion and color change |
| C1: approved clean preparation | B1 / B2 / B3 | Proposed 25 ± 2°C cure; examine at 24 h and 7 days | Proposed 0.50 ± 0.10 mm in recess; measure section | Measure witness hardness; record hardware failure plane | Proposed 24 / 48 / 96 h observations |
| C2: existing sealer retained | B1 / B2 / B3 | Same resin and cure as C1; only sealer differs | Same proposed target as C1 | Pending; compare with C1 | Pending; compare with C1 |
| C3: delayed application | B1 / B2 / B3 | Same preparation; proposed 24 h covered hold before dripping | Same proposed target as C1 | Pending; check aging sensitivity | Pending; compare with C1 |
Use a laboratory-controlled neutral salt-fog procedure, such as ASTM B117, with the agreed edition and chamber settings recorded. The observation times above are proposed screening checkpoints, not guaranteed survival. Specify edge masking, scribing, exposed area, corrosion rating and inspection timing beforehand. Salt-fog hours alone do not predict outdoor service life. See the ASTM B117 scope and limitations.
Report every replicate, not just the best panel. Separate resin blistering, white corrosion, decorative-color change and delamination. Measure color before coating, after cure and after exposure using fixed instrument geometry. Photograph the same marked areas under fixed lighting.
3. Complete Working Formulation: Supplied Two-Part Kit
A complete shop-floor formulation means the purchased resin and matched hardener, not an invented reconstruction of proprietary ingredients. The reference below uses the manufacturer's mass ratio. Ranges are deliberately fixed where chemistry requires a fixed ratio; they are not permission to adjust hardness by adding extra hardener.
| Component | Range | Typical | Function | Replenishment |
|---|---|---|---|---|
| MasterCast Part A, supplied resin blend | 100 parts, fixed reference | 100.0 g | Transparent film-forming component | Weigh fresh material for each batch |
| Matched Part B, supplied hardener blend | 90 parts per 100 A, fixed | 90.0 g | Crosslinks the resin | Add only against freshly weighed A |
| Water or solvent | 0 added | 0 g | Not included in this working recipe | Do not replenish or thin |
| Additional pigment, silicone, accelerator or filler | 0 added | 0 g | Excluded from transparent compatibility trial | Any change requires separate qualification |
| Total mixed batch | Scale A and B proportionally | 190.0 g | 100% purchased two-part system | Never top up aging mixed resin |
The same brochure gives a 1:1 volume ratio; it is not a 1:1 mass ratio. Do not switch measuring methods mid-shift. Actual batch size must fit your measured dispensing capacity and working time. The cited 250 g timing reference does not automatically validate the 190 g example above.
Use calibrated scales, clean dry cups and dedicated utensils. Read both component safety data sheets, provide suitable ventilation and use chemically appropriate gloves and eye protection. Do not use open flames for bubble removal on a finishing bench.
4. Normal Variation versus Stop-and-Investigate Limits
These are proposed internal controls for the pilot, not universal material specifications. Validate them against the selected supplier sheet and successful plant trials. Warning space between normal and stop limits requires review; it is not automatically acceptable.
| Parameter | Proposed normal band | Danger / hold threshold | Required response |
|---|---|---|---|
| Part B per 100 parts A, mass | 89.1–90.9; provisional ±1% dosing control | Outside that band | Hold mixture; investigate calibration, not corrective topping-up |
| Resin and bench temperature | 23–25°C | Below 20°C or above 28°C | Condition components; repeat working-time check |
| Substrate temperature above dew point | At least 5°C margin | 3°C or less, or visible condensation | Stop; dry and recondition specimens |
| Room relative humidity | 40–60% RH | Above 70% RH | Hold trial; check moisture and surface condition |
| Mixed-resin age | Up to 50% of validated working time | Above 70%, stringing or rising cup temperature | Discard safely under site procedure; make a fresh batch |
| Cured recess thickness | 0.40–0.60 mm pilot target | Below 0.30 or above 0.80 mm | Hold affected tray; inspect edge coverage and cure |
| Final rinse conductivity | Proposed ≤30 µS/cm at temperature compensation | Above 50 µS/cm | Investigate carryover; verify surface extraction separately |
Rinse-water conductivity is a process indicator, not proof that a recessed part is residue-free. Likewise, room humidity alone does not establish a dry substrate. Avoid adding a fictitious “resin pH” control: an aqueous plating-bath pH window does not describe this supplied epoxy system.
Trend measurements by tray and batch. A repeated movement toward one limit is actionable even before a stop threshold is crossed. Compare drift with resin age, maintenance, rinse changes and operator transitions.
5. Two Diagnostic Scenarios to Run as Controlled Trials
Scenario A: a clear dome releases from an antique-color puller
This is a troubleshooting exercise, not a claimed customer case. Compare matched parts with and without the existing sealer, using only supplier-approved preparation. Examine both sides of the released resin. A clean decorative surface suggests a resin-to-finish problem; transferred color suggests weakness within the finish stack. Do not automatically sand thin decorative plating or remove a functional passivation layer.
Scenario B: bubbles appear above pores in a zinc-alloy emblem
Map bubble locations against casting defects and compare a flat witness panel with actual parts. Run the approved drying cycle on one group while keeping the other unchanged. If bubbles persist only on cast parts, investigate trapped moisture, residues and porosity before increasing resin thickness. Any stronger heating cycle needs separate color and plating-integrity checks. Do not translate an upstream casting treatment into a post-plating cleaning instruction.
6. Engineer Notes
- Label each tray with plating batch, finish stack, sealer status, resin lots and mixing time before dispensing. Keep one untouched reference part beside the test specimens.
- Check wetting on a sacrificial part first. Stop for fish-eyes, edge retreat or color transfer; increasing dose does not resolve contamination.
- Verify separate A and B delivery masses before connecting a mixer. Purge and qualify the mixed output after nozzle changes under the equipment procedure.
- Measure thickness by a validated cross-section or optical method. Do not assume a magnetic gauge can isolate resin over a nonferrous multilayer stack.
- Measure Shore hardness on a suitable molded witness, not a thin curved dome. Record specimen geometry, cure age and temperature; do not convert Shore D into pencil hardness.
- Select adhesion geometry before testing. ASTM D3359 distinguishes thicker-film Method A from thinner-film Method B around 125 µm; a 500 µm recess is not a routine thin-film cross-cut specimen. Agree a suitable hardware method. See ASTM D3359.
- Quarantine failures by both plating batch and resin batch. Inspect the failure plane and retain fragments before cleaning or reworking anything.
7. Shift Checks
| Shift stage | Check item | Frequency | Acceptance criterion | Record |
|---|---|---|---|---|
| Before shift | Identity, expiry, dosing and scales | Startup and material change | Approved matched kit; dosing within validated band | Lots, calibration check, separate delivery masses |
| Before shift | Rinse, dryness, bench and dew point | Startup and new plating batch | Validated cleanliness; no condensation; control bands met | Conductivity, temperatures, RH, preparation route |
| During shift | Wetting, bubbles and edge coverage | First five parts; then every tray | No visible retreat, exposed required edge or trapped bubble | Tray ID, defect count, reference photo |
| During shift | Mixed age and shot mass | Every mix; hourly delivery check | Age below internal limit; qualified shot-mass range | Mix time, discard time, measured dose |
| After shift | Cure witnesses and quarantine | Every resin / plating batch pairing | Specified cure completed; failed or pending lots held | Witness IDs, cure history, release status |
| After shift | Equipment cleaning and waste | Shutdown | No hardened nozzle residue; waste segregated by site rules | Cleaning sign-off and waste record |
Schedule delayed hardness and exposure readings explicitly. A tray made today cannot be released tomorrow merely because the shift sheet has been signed.
8. Technician Questions to Ask an AI
These are suggested troubleshooting prompts, not attributed customer quotations.
“My clear resin is hard, but it peels off the gold-colored plating. What should I check first?”
Identify the finish and any sealer, then examine the failure plane. Compare controlled clean preparation against the existing route. Hardness confirms neither interfacial adhesion nor plating integrity. Keep chemistry and thickness unchanged until the comparison isolates the cause.
“Can I add more hardener so the dripping resin cures faster during a cold shift?”
No. Keep the supplier ratio and condition components within the qualified temperature window. Check dosing accuracy and actual cure history. Extra hardener changes the chemical balance; it is not an approved substitute for temperature control.
“If my coated puller survives 96 hours of salt fog, can I promise one year without discoloration?”
No. A screening exposure does not establish service life. Compare replicates, document corrosion and color separately, and qualify relevant handling, humidity and wear exposures. Promise only the performance supported by the agreed test report and application evidence.
9. What Would You Like to Solve?
Send the plating stack, sealer identity, resin technical sheet, measured thickness, cure history and failure photographs to [email protected]. Ask for a compatibility test plan before changing a production recipe. For coordination across rinsing, drying and resin application, review integrated surface-treatment equipment, chemicals and process support.
Release a specific resin-and-finish pairing only after measured results satisfy written customer criteria across independent batches. Replace every pending matrix entry with traceable laboratory data; neither published bulk hardness nor a successful demonstration part is a substitute.