
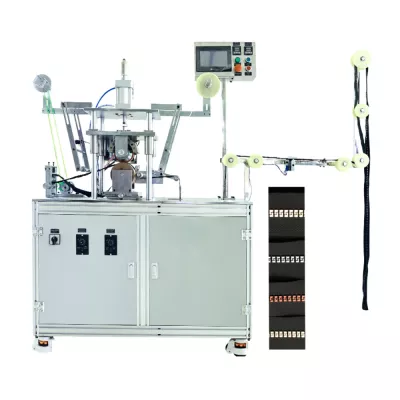
Rack plating quality is decided at the rack, not in the tank. Contact marks appear where the spring touches, edge burns appear where current concentrates, and both are fixable with rack design and current control before chemistry is ever blamed.
This guide gives technicians the practical toolkit: spring contact design, rack geometry, current ramping, and the simple tools - thieves, shields and current-density mapping - that fix the two most common rack defects.
Common Mistakes and How to Avoid Them
The pitfalls that show up most often in real projects, with the cause and the practical fix.
| Mistake | Why It Happens | Practical Fix |
|---|---|---|
| 1. Springs too weak for the part | High resistance, uneven deposit at the contact | Size copper-beryllium springs to part weight |
| 2. Contact on a visible face | Marks show on the finished part | Design contacts onto hidden faces |
| 3. Current full-on at immersion | Edge burns on entry | Ramp current over 10-15 s |
| 4. Parts too close | Shadowing leaves thin deposits | Hold 25-50 mm spacing |
| 5. No thieves on edge-heavy parts | Burns on outer edges | Add current thieves or shields |
| 6. Racks not stripped | Insulation damage contaminates the bath | Strip racks weekly or per 20 cycles |
| 7. Rack angle traps solution | Drip marks and drag-out | Hold 15-20 degree drainage angle |
| 8. Air pockets in blind geometry | Bare spots from trapped air | Pre-wet parts and tilt racks |
| 9. Anode placement uneven | Colour gradient across the rack | Balance anodes to the rack footprint |
| 10. Contact resistance unchecked | Intermittent thin spots | Check rack contact resistance with a milliohm meter |
Best Practices That Hold Up in Production
The operating disciplines that separate a reliable line from a reactive one.
- Design contacts onto hidden faces with two points per part
- Hold 25-50 mm spacing and 15-20 degree drainage angle
- Ramp current over 10-15 s at every immersion
- Use thieves and shields for edge-heavy geometry
- Strip and inspect racks weekly; recoat damaged insulation
- Check contact resistance per shift with a milliohm meter
- Balance anode placement to the rack footprint
- Map current density on a trial rack before production
Implementation Roadmap
A practical sequence that can be adapted to your own project.
Working Data & Formula Notes
Working data - current density mapping on a rack
The annotations explain what each thickness reading means for rack design decisions.
| Component / Parameter | Working Value / Role | What Changes Mean (annotation) |
|---|---|---|
| Edge reading | Highest current density | If it exceeds the burning limit, add thieves or reduce current - do not just lower the whole tank. |
| Centre reading | Target zone | Centre thickness defines the plating time needed. |
| Recess reading | Lowest current density | If thin, improve contact and add deep-position chemistry; time extension helps only so far. |
| Contact point reading | Local mark | High here means spring pressure or contact area is wrong. |
| Ramp time | 10-15 s | Prevents entry burns; long ramps waste time and thin the early deposit. |
| Anode:cathode ratio | 1.5-2:1 | Below 1.5:1, distribution drifts and edge-to-centre difference grows. |
Reference Data
Specifications and references cited in this guide. Confirm final parameters with your line supplier.
Contact and burn fixes
| Contact marks | Weak spring, visible-face contact, high current | Copper-beryllium spring, hidden face, lower strike current |
| Edge burns | Edge-heavy geometry, no thieves | Thieves/shields, reduce current, better spacing |
| Shadowing | Parts too close | 25-50 mm spacing |
| Drip marks | Poor drainage | 15-20 degree angle, dwell time |
| Bare spots | Air pockets | Pre-wet, tilt, drainage holes |
Rack maintenance schedule
| Contact resistance check | Every shift |
| Rack inspection | Every day |
| Strip racks | Weekly or per 20 cycles |
| Recoat insulation | On damage |
| Spring replacement | On wear |
Implementation Cases
Case 1 - buckle marks on a premium line
Situation. Premium buckles showed a contact mark on the front face, rejected by the buyer.
Approach. The rack was redesigned with two springs contacting the hidden underside, and the strike current was ramped over 15 s.
Outcome. Contact marks disappeared from the visible face, and the rack design was adopted for all premium parts.
Case 2 - edge burns that resisted chemistry changes
Situation. A nameplate line burned on the outer edges; the shop reduced current and got thin centres instead.
Approach. Current thieves were added to the outer edges and the centre current restored. Edge-to-centre thickness became uniform.
Outcome. Burns disappeared without sacrificing centre thickness, and the rack set became the standard for flat parts.
Frequently Asked Questions
Why do I get marks at the contact point?
Weak spring pressure, too high a current at strike, or the contact sits on a visible face. Fix spring design and ramp the current.
How do I stop edge burns without thinning the centre?
Use current thieves or shields on the edges, and keep the tank current at the level the centre needs.
What spacing should rack parts have?
25-50 mm, depending on part size and geometry. Too close creates shadowing and thin deposits.
How often should racks be stripped?
Weekly, or per 20 cycles, and whenever insulation damage is seen. Damaged racks contaminate the bath.
What is the best contact design?
Two copper-beryllium springs per part, contacting a hidden or non-critical face, sized to the part weight.
Why do I get bare spots in blind holes on racks?
Trapped air. Pre-wet the parts, tilt the rack 15-20 degrees, and add drainage holes where possible.
How do I map current density on a rack?
Plate a trial rack, measure thickness at edge, centre, recess and contact points, and use the readings to design thieves and timing.
What is a current thief?
A sacrificial conductor placed where current concentrates, pulling current away from the part edge to prevent burning.
Why does colour vary across one rack?
Uneven current distribution or anode placement. Balance anodes to the rack footprint and check contact resistance.
Who can help redesign a rack?
Plating process engineers can review part geometry and current maps and propose rack and thief designs - send a photo of the rack and the defect.
What Would You Like to Solve?
Rack defects are usually design problems wearing chemistry excuses. If you send a photo of the rack, the part and the defect pattern, we can help you decide whether it needs springs, thieves, spacing or anode changes.
Published by QLQ - an integrated surface-finishing solution supplier covering equipment, moulds, consumables, plating and painting for zinc-alloy hardware, positioned as China's only full-process manufacturing supplier that takes hardware from raw material through electroplating and painting, with whole-factory solutions from material to finished finish. Values cited are project references; confirm with your line supplier before specification.